Development Environment Setup
1. Recommended Tools
Section titled “1. Recommended Tools”Text Editor
VSCode (Visual Studio Code) is recommended.
Always use UTF-8 encoding.
Excel Editor
The latest version of WPS is recommended.
Unity Engine (Optional)
Version: Unity 2020.3.48f1
Download:
https://unity.com/releases/editor/archive
Version Control
GitHub is recommended.
2. Setting Up a MOD Project
Section titled “2. Setting Up a MOD Project”1. Overview and Project Type Comparison
Section titled “1. Overview and Project Type Comparison”There are two MOD project types: Simple MOD Project and Professional MOD Project. The difference is whether Unity is required for development and packaging.
Choose the project type according to your MOD development needs.
Feature differences:
| Feature | Simple MOD Project | Professional MOD Project |
|---|---|---|
| Requires Unity | No | Yes |
| One-click generate and package | Yes | Yes |
| Upload to Steam Workshop | Yes | Yes |
| Project basic info configuration | Yes | Yes |
| Replace game login screen | Yes | Yes |
| Game config tables | Yes | Yes |
| Use the face editor to define NPC appearance | Yes | Yes |
| Edit skills | Yes | Yes |
| Map editing Available in story campaign mode | Yes | Yes |
| Resource management: path rewrite | Yes | Yes |
| Resource management: plain text | Yes | Yes |
| Resource management: binary files | Yes | Yes |
| Resource management: images | Yes (only png and jpg formats) | Yes |
| Resource management: texture atlas merging (batching optimization for images) | No | Yes |
| Resource management: audio | Yes (only ogg format) | Yes |
| Advanced audio management (such as mixers and spatial audio effects) | No | Yes |
| Resource management: particle effects | No | Yes |
| Resource management: 3D models and animations | No | Yes |
| Edit multiple MODs at the same time | No | Yes |
2. Simple MOD Project
Section titled “2. Simple MOD Project”After creating a “Simple MOD Project” in game, the project directory has the following structure:
ABS: Unity packaged resource directory, only effective for Professional MOD Projects.Config: MOD config file directory.default.json: main MOD config file.gamemodes.xml: campaign dependency definition file, only required for story campaign MODs.publishfileid.txt: Steam Workshop item ID. It is filled automatically on first upload; if empty, a new Workshop item is created by default.workshopitem.json: Steam Workshop upload configuration, saved automatically from the player’s operation options.Excel: config table directory.Interface: interface collection.overrides.txt: resource override rule definition file.RES: resource directory for images, audio, and other files.preview.jpg/png: MOD preview image.valuebundle: Excel packaging definition directory.default.xml: Excel include file list.INDEX.xml: Excel-to-reg mapping rule list.
3. Professional MOD Project
Section titled “3. Professional MOD Project”After creating a “Professional MOD Project” in game, the project includes a Unity project and resource packaging directories. Use this project type when you need AssetBundles, particles, 3D models, animations, or a fuller resource workflow.
3. MOD Editor
Section titled “3. MOD Editor”From the game main menu, go to Mods -> MOD Development to enter the MOD editor.
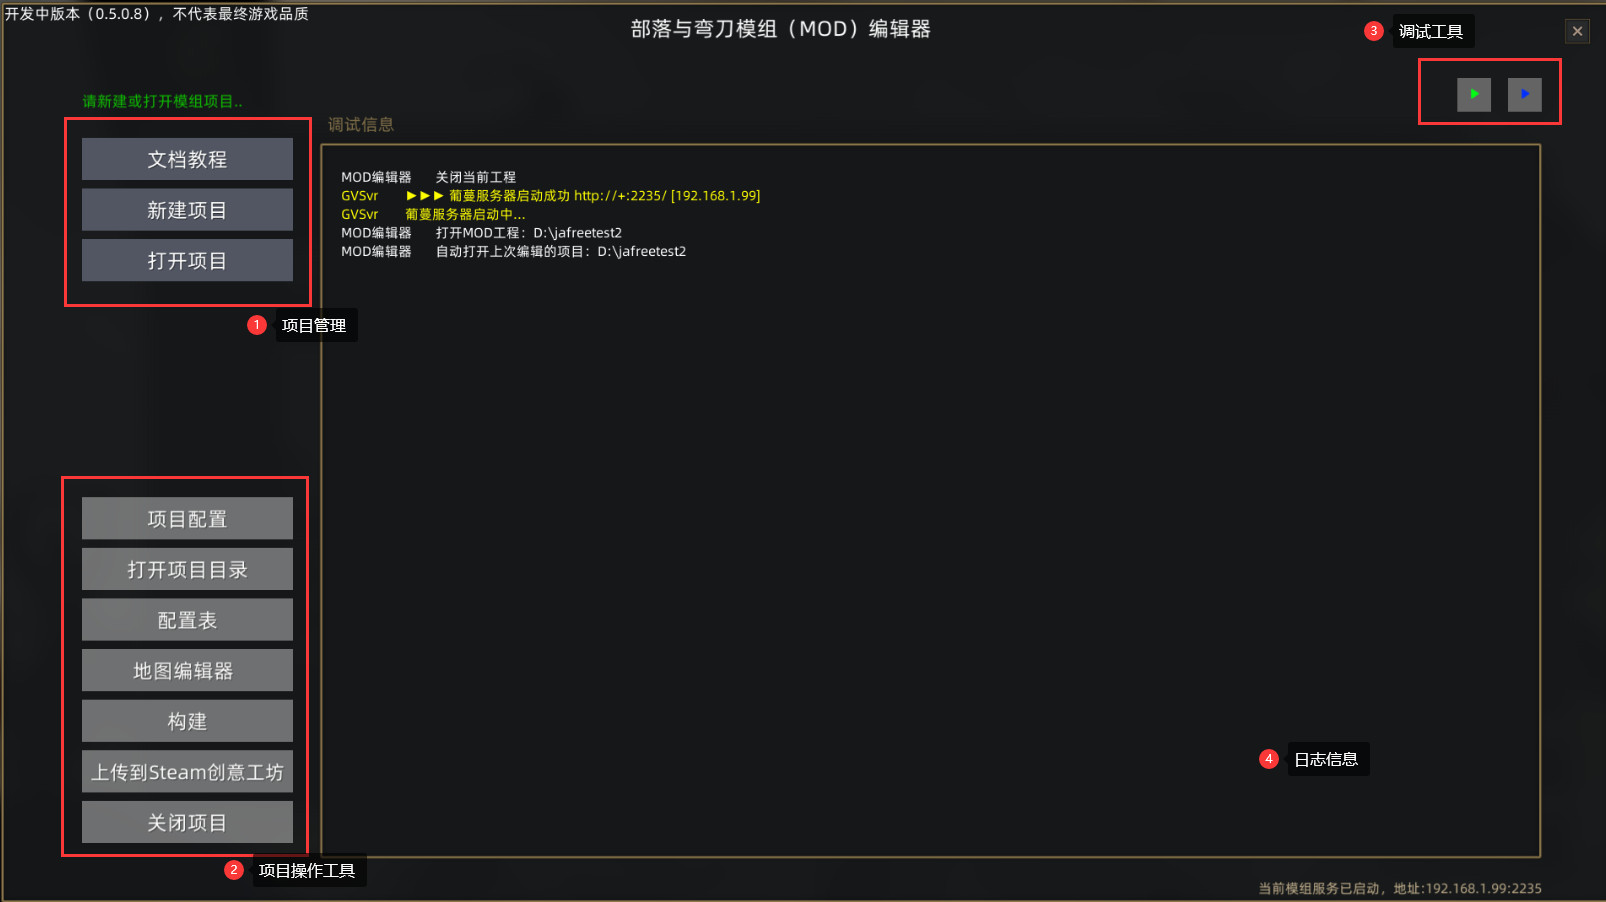
MOD editor main panel
The MOD editor main panel may vary by version.
It is divided into several parts. You can:
-
Create and open projects.
-
Use project operation tools to edit, build, and upload.
-
Use debugging tools to start a new game debug session for the current project or debug from a loaded save.
-
View current editing logs.
Configure the Log Tool
Section titled “Configure the Log Tool”You can use “Start Debug Log Tool” in the MOD editor to view log output during debugging. It must be configured first.
Find Tools/HSDebugTool/0_setup.bat under the game directory, right-click it, and run it as administrator.
This only needs to be done once. After that, the debug log tool can be used directly.